Reading the Zumo 32U4 Proximity Sensors

There are three IR proximity sensors on the Zumo.  All of them are on the lower sensor board that contains the downward facing light sensors.  In addition to the sensors, there are four IR emitters.  There are two front IR emitters that are in standard thru-hole LED packages on the front of the robot at the top of the metal blade.  There are also two side facing surface mount emitters that are on the sides where the circuit board extends through the tracks.  The left front and the left side emitters operate in parallel, and the right front and right side operating in parallel.

When you issue the command to read the sensors with the command:

proxSensors.read(); 

The robot sends our 6 IR pulses on the left side, and 6 pulses on the right side.  The pulses are at 38 kHz, which is also a standard frequency for digital pulses for IR remote control applications like TV remote controls and IR headphones.  So, there is always a potential for interference.  Each of the six pulses that are transmitted are at a different amplitude level.  After the IR pulses are emitted, then may find an object to reflect off of and get received by the IR receivers of the robot.  As the pulses travel, their amplitude drops off rather quickly (1/r^2 for each way).  The further away an object is, the lower the amplitude of the received pulse.  The IR receiver simply counts the number of pulses that it can measure.  Let’s say an object is a medium distance away.  The very low amplitude pulses can not be received with sufficient amplitude.  However, medium and high power pulses would be detected, so the number of pulses would be somewhere from 3-4.  If the object is very far away, maybe only the highest power pulse would be received, and the number of pulses would be 1 (or 0 if no pulses were received).

The proximity sensor read command takes care of sending the 6 pulses on both the left and the right, as well as measuring the 3 IR sensors for both the left and right sides.  However, we aren’t terribly interested in the left sensor receiving from the right side or the right sensor receiving from the left side.  The following functions return integers ranging from 0 to 6 depending on the amount of IR light that is reflected back.

proxSensors.countsLeftWithLeftLeds()
proxSensors.countsLeftWithRightLeds()
proxSensors.countsFrontWithLeftLeds()
proxSensors.countsFrontWithRightLeds()
proxSensors.countsRightWithLeftLeds()
proxSensors.countsRightWithRightLeds()

As previously discussed, reading one side with the opposite side LED doesn’t really provide us with a lot of information.  However, the front sensor with the left LED vs the right LED does give us some useful information regarding the direction an object may be.

Our goal of this post is simply to read the proximity sensors and display the values on the LCD.  As usual, we need to include the Zumo32U4 library, rename the LCD and Proximity Sensor classes to something more usable, initialize the proximity sensors, read the values, and write the values to the display.  The only item that is really new is how to read the sensors, and how to get the values.  It should be fairly straight forward from the example program below.

#include <Zumo32U4.h>
Zumo32U4LCD lcd;
Zumo32U4ProximitySensors proxSensors;

void setup() {
  proxSensors.initThreeSensors();
}

void loop() {
  proxSensors.read();
  lcd.clear();
  lcd.gotoXY(0,1);
  lcd.print(proxSensors.countsLeftWithLeftLeds() );
  lcd.gotoXY(2,0);
  lcd.print(proxSensors.countsFrontWithLeftLeds() );
  lcd.gotoXY(5,0);
  lcd.print(proxSensors.countsFrontWithRightLeds() );
  lcd.gotoXY(7,1);
  lcd.print(proxSensors.countsRightWithRightLeds() );
  delay(100);
}
Posted in Robotics | Tagged , , | Comments Off on Reading the Zumo 32U4 Proximity Sensors

Zumo 32U4 Drive to Edge

This post discusses a common issue with any sumo event or competition that involves navigating to a line.  Our goal with this post is simply to drive the robot placed on a light colored surface until it reaches a dark color.  In the case of my office, I have a light colored desk, and I want to drive it to the edge of the table and stop (preferably without going over the edge!).

This uses the light sensor calibration function from the previous post, so if you don’t have that, you would want to go back and look at it.  My main program looks like this:

#include <Zumo32U4.h>

Zumo32U4LCD lcd;
Zumo32U4ButtonA buttonA;
Zumo32U4Motors motors;
Zumo32U4LineSensors lineSensors;
Zumo32U4Buzzer buzzer;

#define FORWARD_SPEED 200
#define EDGE_THRESHOLD 500

unsigned int lineSensorValues[3];

void setup() {
  lineSensors.initThreeSensors();
  calLightSensors(10);
}

void loop() {
  lcd.print("Press A");
  motors.setSpeeds(0, 0);
  buttonA.waitForButton();
  lcd.clear();
  delay(200);
  drive2line(FORWARD_SPEED);
} 

The #define statements at the beginning define constants used in the program.  If there is a constant that you use through the program, it often is best to define it at the beginning so you only need to change it in one place if you every want to adjust it.

The function that is new in the program is drive2line(speed), which we need to create.  The basic flow of this is to turn the motors on, monitor the light sensors (take repeated readings) until either light sensor sees a value greater than EDGE_THRESHOLD, then turn the motors off.  Setting the speed and turning the speed to 0 is easy, and we did that in previous posts.  Reading the light sensors is also something that we’ve already done.  We’ve also already done something very similar by reading the encoders until they reach a certain value.  All we need to do is to put together what we already know.

We will be reading the light sensors inside a do… while statement.  The condition to continue the loop will simply be that both of the outer light sensors see a light colored surface (low value on reflected light).  We want to stay in the loop while the left sensor sees white and the right sensor sees white.  If either one sees a dark color, we want to exit and turn the motors off.  This can be accomplished with the following:

void drive2line(int motorSpeed) {
  motors.setSpeeds(motorSpeed,motorSpeed);
  do {
    lineSensors.readCalibrated(lineSensorValues);
  } while (lineSensorValues[0]<EDGE_THRESHOLD && lineSensorValues[2]<EDGE_THRESHOLD);
  motors.setSpeeds(0,0);
} 

Remember, the && symbol is a logical AND operation.  Assuming that you add the drive2line(speed) function, and copy the light sensor calibration function from the previous post, the robot should run the light sensor cal, then wait for the user to press the button, drive at a speed of 200 until it sees the edge of the table (or a black line), stop, then wait for the button and repeat.  Try increasing the speed and have some fun.  Just always be ready to catch the robot so it doesn’t go over the edge.

Posted in Robotics | Tagged , | Comments Off on Zumo 32U4 Drive to Edge

Zumo 32U4 Downward Light Sensors, Part 2 – Calibration

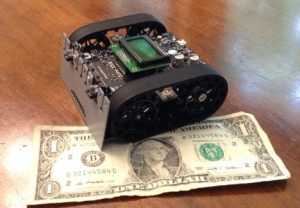
This post will discuss how to calibrate the downward facing light sensors, and to read the calibrated values.  I went a little over the top on the calibration function, but it makes it that much nicer.  You can certainly do something a little less fancy and simplify, but I like things looking nice.
For the calibration, I added some button functions and the buzzer.  I’ll have a post later discussing more regarding the buttons and buzzer, but for now, you just need to know a couple of things.  First of all, button A and the buzzer have their own class, and we should rename it like we did with the motors, LCD, and line sensor array.  We also need the Zumo32U4 library file.  The beginning of the program should look like this:
#include <Zumo32U4.h>
Zumo32U4LineSensors lineSensors; 
Zumo32U4LCD lcd; 
Zumo32U4ButtonA buttonA; 
Zumo32U4Buzzer buzzer;
We also need to declare our 3 element array for the light sensors.  We will use it in multiple spots in the program without passing parameters, so it should be a global variable.  Therefore, let’s put it next:
unsigned int lineSensorValues[3];
Before we get to the rest of the program, let’s talk a little bit about functions, and the purpose of the setup() and loop() portion of the program.  The setup() and   loop() are meant to be high level portions of the program, and easily readable without distraction.  We’ve been using basic commands in these portions of the program in previous posts simply because the programs have been very simple.  In more complicated programs, these sections should be very short with high level function calls.  All of the nitty-gritty details should be done in various functions.  My rule of thumb is that if the setup and main cannot be basically understood by someone not familiar with the program, it should be simplified.  Therefore, we should probably write a separate function for the light sensor calibration.
The light sensor calibration function lineSensors.calibrate() takes a light sensor reading on all active light sensors and stores it.  It doesn’t matter if it is high reflectivity, low reflectivity, or anywhere in between.  You can run this function many times.  Each time you run it, it looks to see if the new value is larger or smaller than any of the previous values.  Unlike the EV3, where you need to specify if you are measuring a minimum or maximum, this function takes care of it for you.  As a result, you could continuously run the calibration for a period of time, and scan the robot across an area that has a wide range of reflectance.  Below is my version of the light sensor calibration function:
void calLightSensors(int CalTime) {
  lcd.clear();
  lcd.gotoXY(0,0);
  lcd.print("Press A");
  lcd.gotoXY(0,1);
  lcd.print("to Cal");
  buttonA.waitForButton();
  buzzer.playFrequency(440, 200, 15);
  lcd.clear();
  lcd.print("Cal\'ing");
  for (int i = 20*CalTime; i > 0; i--) {
    lcd.gotoXY(0, 1);
    if(i%20==0) {
      lcd.print(i/20);
      lcd.print(" ");
      buzzer.playFrequency(440, 50, 15);
    }
    lineSensors.calibrate();
    delay(20);
  }
  buzzer.playFrequency(600, 200, 15);
  lcd.clear();
  lcd.print("Cal Done");
  delay(1000);
}
The overall flow of the function is pretty simple, but there is a lot added to make it more user friendly.  The basic flow is
  1. Wait for the button to be pressed.
  2. Run the loop a lot of times.
    1. As the loop is running, display approximate time left during the calibration.
    2. Run a cal each time through the loop.
  3. End and let the user know the cal is done.

Starting at the beginning, the function name is calLightSensors and it does not return a value, which is why the function is defined as void.  The function accepts one input parameter, which is an integer.  The input parameter is the amount of time you want to give the function to light cal.  In some cases, you want the cal to go quick, other times, you may want a lot of time to push the Zumo around the table to profile as much of the different lighting conditions possible.

The next step is to display a message to the user to press the A button to begin the calibration, then the program runs the command buttonA.waitForButton().  This function does exactly what it says.  It pauses the program until button A is pressed.  Whenever pressing a button, I like to have a little feedback, usually in the form of a beep, to tell me that the button was pressed.  The function

buzzer.playFrequency(440, 200, 15); 

plays a tone at 440 Hz for 200 ms at a volume level of 15 (15 is the highest).  I’ll get into more functions of the buzzer in a later post, but for the time being, all I want to do is play a beep, and this accomplishes it.

The next section is a for loop.  A for loop is a type of loop that is used for running a section of code repeatedly for a specific number of times.  The syntax for a for loop is given below:

for (initialization; condition; increment) {
  //statement(s);
}

The very first time through the for loop, it initializes a counter.  The loop runs until the counter reaches a certain condition, and finally, the counter is either incremented or decremented.  Assuming that the counter meets the condition, everything with the { } is executed.  For my case, the for loop reads:

for (int i = 20*CalTime; i > 0; i--) {
  // statements to be executed
} 

For the initialization, the statement int i = 20*CalTime says that I’m initializing integer i to be 20 times the amount of time I’d like to calibration for.  Remember that CalTime was an input parameter to this function.  If we assume 10 s, then we are initializing i to be 200.  The condition here is i>0.  That is, we want to execute the contents of this for loop as long as i is greater than 0.  The increment is i--, which is shorthand for i=i-1.  Assuming that CalTime is 10, this loop would execute 200 times as i changes from 200 to 0, decrementing by a value of 1 each time through the loop.

We want to run a calibration each time through the loop, and have a slight delay.  We could simply run the loop as:

for (int i = 20*CalTime; i > 0; i--) {
  lineSensors.calibrate();
  delay(20);
} 

However, this provide no information to the user about how much time they have left on the calibration.  By the way, the delay time was adjusted to provide approximately the correct amount of time for CalTime to work out to seconds.  The calibration function takes a little time to run, and I knew I wanted about 20 calibration readings per second.  It took a little trial and error and is not exact.  What I’d like to have now is a countdown so I know how much time I have left.  The easiest way to do that is to use the variable i.  If I printed the value of i directly on the display, it would count down from 200 to 0 changing values about 20 times a second (50 ms).  That isn’t terribly useful.  I’d like to display in seconds.  Every time i becomes a multiple of 20, it would represent a 1 second increment in time.  If you take i and divide by 20, you can tell if i is a multiple of 20 if the remainder is 0.  Arduino has an arithmetic operation called the modulo (or modulus), which displays the remainder of a division operation.  The modulo operator is the percent sign (%).  i%20 would give the remainder of i divided by 20.  If this value is 0, then we know we are at a multiple of 20, and we are at a 1 second increment.

if(i%20==0) {
  lcd.print(i/20);
  lcd.print(" ");
  buzzer.playFrequency(440, 50, 15);
} 

The statement above says that if the modulus of i/20 is 0 (the == is the logical statement for equal to – note that this is very different to a single equal sign which means we are assigning a value), the we execute the statements within the { }.  In this case, we are writing the number of seconds (i/20) to the display and playing a beep.  Why do you think writing the ” ” (writing a space) is necessary?

After the calibration and countdown, the function simply tells the user that the calibration is done.

Now that the function calLightSensors() is written, it can be called in the setup() part of the program as we only want to execute this once.

In order to read the calibrated values of the light sensors, you can use the following command:

lineSensors.readCalibrated(lineSensorValues); 

Displaying the values to the LCD is identical to the previous blog posting.  However, to do this a more correct way, we should really make the display commands into a function called displayLCD().  The complete version of the program is below:

#include <Zumo32U4.h>
Zumo32U4LineSensors lineSensors;
Zumo32U4LCD lcd;
Zumo32U4ButtonA buttonA;
Zumo32U4Buzzer buzzer;
unsigned int lineSensorValues[3];

void setup() { 
  lineSensors.initThreeSensors(); 
  calLightSensors(10); 
  lcd.clear(); 
  lcd.gotoXY(0,0); 
  lcd.print("Press A"); 
  lcd.gotoXY(0,1); 
  lcd.print("to Cont."); 
  buttonA.waitForButton();   
  buzzer.playFrequency(440, 200, 15); 
  lcd.clear(); 
} 

void loop() { 
  lineSensors.readCalibrated(lineSensorValues); 
  displayLCD(); 
  delay(50); 
}

void calLightSensors(int CalTime) { 
  lcd.clear(); 
  lcd.gotoXY(0,0); 
  lcd.print("Press A"); 
  lcd.gotoXY(0,1); 
  lcd.print("to Cal"); 
  buttonA.waitForButton(); 
  buzzer.playFrequency(440, 200, 15); 
  lcd.clear(); 
  lcd.print("Cal\'ing"); 
  for (int i = 20*CalTime; i > 0; i--) { 
    lcd.gotoXY(0, 1); 
    if(i%20==0) { 
      lcd.print(i/20); 
      lcd.print(" "); 
      buzzer.playFrequency(440, 50, 15); 
    } 
    lineSensors.calibrate(); 
    delay(20); 
  } 
  buzzer.playFrequency(600, 200, 15); 
  lcd.clear(); 
  lcd.print("Cal Done"); 
  delay(1000); 
} 

void displayLCD () { 
  lcd.clear(); 
  lcd.gotoXY(2, 0); 
  lcd.print(lineSensorValues[1]); 
  lcd.gotoXY(0, 1); 
  lcd.print(lineSensorValues[0]); 
  lcd.gotoXY(4, 1); 
  lcd.print(lineSensorValues[2]); 
} 

Note that the functions can simply be placed after the loop() function.  You can actually place the functions anywhere you want, but it is typical to have setup() and loop() first, then any functions after that.  Another option, which is what I typically do, is to place groups of functions as separate tabs in the Arduino IDE.  If you run this program, and move the robot around to a full range of reflectance values during the calibration period including the minimum reflectance and the maximum reflectance, you should have displayed values ranging between 0 and 1000 with 0 being the most reflective and 1000 being the least reflective.  All three light sensors should also be more equal if they are on an object of similar reflectivity from one another.

The light sensor calibration stores the calibration factors in what’s called volatile memory.  That is, when the robot is turned off or reset, it forgets the calibration.  Therefore, if you want calibrated values, you need to calibrate once every time the robot is turned on.

Posted in Robotics | Tagged , | Comments Off on Zumo 32U4 Downward Light Sensors, Part 2 – Calibration

Reading the Zumo 32U4 Downward Facing Light Sensors, Part 1

The Zumo 32U4 has 5 downward facing light sensors on the front light sensor array.  The light sensor array board also has 3 IR sensors used for proximity sensors or IR receivers for remote control.  However, two of the light sensors share data sensor lines with two of the IR proximity sensors.  For the time being, we are only going to look at using 3 of the 5 downward facing light sensors.  We will discuss more about how to switch to 5 sensors later when we talk about line following.

As usual, we need to include the library and rename the classes that we are going to use to something shorter.  In this program, we will need the Zumo32U4LCD class and the Zumo32U4LineSensors class.  The beginning of the program should look like this:

#include <Zumo32U4.h>
Zumo32U4LCD lcd;
Zumo32U4LineSensors lineSensors;

The library functions for reading the lights sensors wants to put the data into a 3 element array of unsigned integers.  An unsigned integer is nothing more than an integer that can only be positive.  An array is simply a list of values, like in the EV3.  However, reading and writing to an array in C is much easier than in EV3.  A particular element of an array is referred to by the array index inside square brackets.  If we wanted to access index 2 of array myArray, we would refer to it as myArray[2].  Like all variables in C, we need to declare them.  We are going to declare the line sensor value array at the very beginning to make it a global variable.  The line declare the array looks like this:

unsigned int lineSensorValues[3]; 

In this statement, we are declaring that the variable lineSensorValues is a 3 element array of type unsigned int.  In order to use the line sensor array, we need to run an initialization function.  This basically turns the sensors on and gets them ready for use.  We only need to run this once, so let’s put it in the setup().  The function to initialize the sensors is:

lineSensors.initThreeSensors(); 

To read the sensors, we use the function:

lineSensors.read(lineSensorValues,QTR_EMITTERS_ON); 

This stores the three uncalibrated light sensor values of each light sensor in the array lineSensorValues that we declared up above.  The “QTR_EMITTERS_ON” option forces the emitters to be on to measure the reflected light intensity.  Note that is not necessary as the default condition has the emitters turned on.  However, it is useful to include.  The left sensor value is stored in lineSensorValues[0], the middle sensor is stored in lineSensorValues[1], and the right sensor value is stored in lineSensorValues[2].  We will discussed calibrating the light sensors in a later post.

We just need to display these values, and we should be set.  In the “Hello World” program, we wrote a string to the display (a portion of text between quotes).  To write the value of a variable is done in much the same way, but no quotes.

lcd.print(lineSensorValues[0]); 

In order to fit all three values on the display, we need to stagger the position on the 2×8 element LCD.  The complete program is below:

#include <Zumo32U4.h>
Zumo32U4LCD lcd;
Zumo32U4LineSensors lineSensors;

unsigned int lineSensorValues[3];

void setup() {
  lineSensors.initThreeSensors();
}

void loop() {
  lineSensors.read(lineSensorValues,QTR_EMITTERS_ON);
  lcd.clear();
  lcd.gotoXY(2, 0);
  lcd.print(lineSensorValues[1]);
  lcd.gotoXY(0, 1);
  lcd.print(lineSensorValues[0]);
  lcd.gotoXY(4, 1);
  lcd.print(lineSensorValues[2]);
  delay(20);
} 

I also added a delay of 20 ms between updates.  This program executes each time through the loop in less than 1 ms, and the display looks like noise.  The 20 ms delay slows it down enough that one can almost read it.  The light sensor values are uncalibrated and range from a low value (100ish) to a value of about 2000 when completely saturated by an external light.  On my light colored table, I get about 110-200 depending on the sensor, and I get between 1100-1200 if the robot is leaning off the table.

One thing to try is to change QTR_EMITTERS_ON to QTR_EMITTERS_OFF.  This turns off the emitters and measures the background light.  You will probably get a value of 2000 on all of the sensors.  If you shine a light on an emitter, the value will quickly drop.  One of the start conditions of a sumo competition that we participate in often uses a light bulb to signal the start of the match.  Turning the emitters off would allow one to easily sense the light bulb.

Posted in Robotics | Tagged , , | Comments Off on Reading the Zumo 32U4 Downward Facing Light Sensors, Part 1

Zumo 32U4 Simple LCD Display Test

I realized that before we can work on reading the light sensors, we probably should cover an easy way to display the data.  There are a couple of ways to display data on the Zumo.  One, which we will cover later, is to use the serial monitor.  This is a method of communicating between the Arduino and your computer over USB to send data.  This is a great method, and we will get to it later.  However, another method is to simply write the information to the LCD on the robot.  This can be useful as it allows you to see the data without being tethered to a computer.
In this post, we will simply just write the customary “Hello World” statement to the display.  Like previous posts, we need to include the Zumo32U4 library, and it is always helpful to create a shorten name for the class that we are using.  The class for driving the LCD is Zumo32U4LCD, and let’s create an instance of it and call it simply “lcd.”  Both of these steps are done in the lines:
#include <Zumo32U4.h>
Zumo32U4LCD lcd; 
 Since we are just displaying once, we will put everything in the setup().  In this case, loop will be empty.  The LCD displays the items that you tell it, then it holds the display and does not need to be refreshed until you want to do something different with it.  There are a couple of commands that you will need.  The first is:
lcd.clear();
 This simply clears the display.  In a lot of cases, the display is already clear, but sometimes, it has remnants from previous programs.  It is always a good idea to clear the display.  The next step is that we need to tell the display where to write our message.  The display has 2 lines of 8 characters.  We cannot write the entire display to a single line, so let’s split it on two lines.  We need to specify that we want to start the first line at the far left position.  The LCD positions start at 0.  The first line, left most position would be (0,0).  We can specify that we want to start there with the following command:
lcd.gotoXY(0,0);
Then to print the word “Hello,” we would use:
lcd.print("Hello");
Writing the word “World” is the same method, but let’s start this on the second line, third character location, or (1,2).  The entire program is then:
#include <Zumo32U4.h>
Zumo32U4LCD lcd;
void setup() {
  lcd.clear();
  lcd.gotoXY(0,0);
  lcd.print("Hello");
  lcd.gotoXY(1,2);
  lcd.print("World");
}

void loop() {
  // put your main code here, to run repeatedly:
}


Posted in Robotics | Tagged , | 2 Comments

Zumo 32U4 Motor Encoders

In the previous post, we walked through how to turn the motors on for a specific amount of time.  In this post, we will turn the motors on for a specific amount of encoder pulses.  Like the EV3, encoders count fractions of a rotation.  The EV3 uses an optical encoder where it shines a light through a rotating disk.  The zumo uses what is called a quadrature magnetic encoder.  It senses changes in magnetic field and eddy currents to measure 1/12 of a rotation.  For the EV3, it was simple in that each encoder pulse equated to 1 degree of rotation after the gearing of the motor.  For the Zumo, it is similar, but the numbers don’t quite match.  Each motor rotation produces 12 encoder pulses.  However, the gear ratio after the motor is ultimately what determines the number of pulses per rotation.  My Zumo has a gear ratio of 75.81:1.  That is, for every 75.81 rotations of the motor, the wheel would make 1 rotation.  Since each encoder produces 12 pulse for each motor rotation, that means that the encoder measures 75.81 x 12 pulses for each wheel rotation, or about 909.7 pulses.

Anyway, let’s demonstrate how to read the encoders, and how to uses them to make the robot move forward a certain distance, then backwards a certain distance.  For the sake of this demonstration, let’s do the following steps:

  1. Delay 1 second.
  2. Move forward at a speed of 200 for 2000 encoder counts (a little more than two wheel rotations).
  3. Stop the Motors and pause for 1 second.
  4. Move backwards at a speed of 200 for 2000 encoder counts.
  5. Stop, then repeat.

Like the previous program, we need to include some objects from the Zumo32u4 library.  We are creating an instance of the object Zumo32U4Motors, and calling it “motors.”  We are also using the Zumo32U4Encoders class, so we need to create an instance of the Zumo32U4Encoders class and call it “encoders.”  Therefore, the section before the main body of the program should look something like this:

  #include <Zumo32U4.h>
  Zumo32U4Encoders encoders;
  Zumo32U4Motors motors; 

The next section is the Setup().  Like the previous program, there really is nothing to set up for this simple task.

After the setup(), we need the loop() function.  One really big difference between C and EV3-G is that all variables have to be declared.  In EV3-G, we would just insert a variable anywhere we wanted one, and all variables were global.  In C (which Arduino is based from), we have to declare our variables where they will be used, and assign a type to the variable.  In this case, we would like to create a variable for the left encoder, and one for the right encoder.  The type of variable is “int,” which is short for integer.  You declare the variables like below:

  int countsLeft;
  int countsRight; 

Once they are declared, we can use them.  The very first operation we should do is measure and reset the encoders.  This is done with the following:

  countsLeft = encoders.getCountsAndResetLeft();
  countsRight = encoders.getCountsAndResetRight(); 

The command getCountsAndResetLeft() is a member of the class of Zumo32U4Encoders, which we renamed to encoders, and it returns an integer.

The next steps should be similar to the previous post.  We need to delay for 1 s, then set the motors to forward at a power of 200.

  delay(1000);
  motors.setSpeeds(200,200); 

Once the motors are set, we need to continuously measure the encoder values until they reach a value of 2000 counts.  This is similar to the EV3 loop block.  For the Zumo, it is a “do {….   } while ();” statement.  This statement does all the commands within the { } while the condition within ( ) is met.  We need to put the encoder measurements with the { } brackets.  We want to perform this act while both the left and right encoders are less than 2000.

  do {
    countsLeft = encoders.getCountsLeft();
    countsRight = encoders.getCountsRight();
  }  while(countsLeft<2000&&countsRight<2000); 

The above section of code performs these actions.  The loop will run as long as the left and right encoders are less than 2000.  The “&&” is the logic AND operation.  Once the condition is met, we need to turn the motors off and delay for a second.

  motors.setSpeeds(0,0);
  delay(1000);  

Moving the robot in reverse is simply the opposite.  You could leave the encoders where they are (at about 2000) and drive while they are greater than 0.  I like to go for simplicity and just reset the encoders.  To move backwards the code is:

  countsLeft = encoders.getCountsAndResetLeft();
  countsRight = encoders.getCountsAndResetRight();
  motors.setSpeeds(-200,-200);
  do {
    countsLeft = encoders.getCountsLeft();
    countsRight = encoders.getCountsRight();
  }  while(countsLeft>-2000&&countsRight>-2000);
  motors.setSpeeds(0,0);  

Putting the whole program together:

#include <Zumo32U4.h>

Zumo32U4Encoders encoders;
Zumo32U4Motors motors;

void setup() {
}

void loop() {
  int countsLeft;
  int countsRight;
 
  countsLeft = encoders.getCountsAndResetLeft();
  countsRight = encoders.getCountsAndResetRight();
 
  delay(1000);
  motors.setSpeeds(200,200);
  do {
    countsLeft = encoders.getCountsLeft();
    countsRight = encoders.getCountsRight();
  }  while(countsLeft<2000&&countsRight<2000);   
  motors.setSpeeds(0,0);   
  delay(1000);     

  countsLeft = encoders.getCountsAndResetLeft();   
  countsRight = encoders.getCountsAndResetRight();   
  motors.setSpeeds(-200,-200);   
  do {     
    countsLeft = encoders.getCountsLeft();     
    countsRight = encoders.getCountsRight();   
  }  while(countsLeft>-2000&&countsRight>-2000);
  motors.setSpeeds(0,0);
} 

The next post will probably be on reading the downward facing light sensors.

Posted in Robotics | Tagged , , | Comments Off on Zumo 32U4 Motor Encoders

Zumo Simple Driving Program

These blog posts on the Zumo will start out very simple.  This is assuming the reader has little to no Arduino experience.  The goal of this post is simply to teach the reader how to write a program that will make the Zumo robot move forward for 1 second, pause, move backwards for 1 second, pause, then repeat.

When using the Zumo 32U4, you need to include the Zumo 32U4 library file.  This includes all of the basic commands to interface with the robot.  This is done by adding the line:

include <Zumo32U4.h>

to the program.  This should be the first line in the program (after any comments you might add).  The second line you will want to add is:

Zumo32U4Motors motors;

Zumo32U4Motors is what’s called a Class.  A Class is a way of defining an object.  We can discuss Classes later, but what you need to understand is that we need to create an object using the Class Zumo32U4Motors, and call it “motors.”  This is done using the line above.  From here on out, we can refer to our instance of the class simply as motors.

Now that we got that stuff out of the way, every Arduino program has to have two sections.  When you create a new program, the Arduino IDE will create these two sections for you.  It should look something like:

void setup() {
  // put your setup code here, to run once:
}
void loop() {
  // put your main code here, to run repeatedly:
} 

These are actually both functions, one named “setup” and the other named “loop.”  Traditionally, functions return values, and the type of value that they return needs to be defined before the function name.  However, these functions do not return anything.  Therefore, their type is call void.  When the Arduino executes a program, it runs the setup function once, then runs the loop command over and over and over, until the power is turned off or the master reset is pressed.  When it runs a function, it executes everything between the { }.  In this case, there are only comments.  Whenever you have “//” it tells the compile to skip the rest of the line when compiling.  These are comments only for the users to read and the Zumo never sees them.

In the case of our simple program, we have nothing to set up, so just leave the setup function as it is.  Don’t delete it, as the compiler needs to have the function present, but you don’t need to type anything inside it.

For the loop function, you will need some delays and motor commands.  The first command we want is a 1 second delay.  This can be accomplished with the delay command.  This is a function that tells the robot not to do anything different for a certain number of milliseconds.  To delay for 1 second, you would need:

  delay(1000);

Note that the command requires a semicolon after it.  All commands other than compiler directives (like the include statement above) require a semicolon after them.

The next command that we will need is a motor command.  The command belongs to the class Zumo32U4Motors, but remember we created an object for this called motors.  When writing a command that is part of a class, we need to follow the format of classname.command().  The command is setSpeeds().  This command takes two arguments, namely, the left motor speed and the right motor speed.  Zumo speeds range from -400 to +400 and are always integer values.  To make the robot move forward at full speed, we would need:

  motors.setSpeeds(400, 400);

If we want to go forward for 1 second, we would need to follow this with another delay.  To stop the robot, you would then need:

  motors.setSpeeds(0, 0);

Going backwards is the same, but use speeds of -400.

Putting everything together, the program would be:

#include <Zumo32U4.h>
Zumo32U4Motors motors;

void setup() {
}

void loop() {
  delay(1000);
  motors.setSpeeds(400, 400);
  delay(1000);
  motors.setSpeeds(0, 0);
  delay(1000);
  motors.setSpeeds(-400, -400);
}  

You can modify this to do any sort of blind movement you would like.  However, keep in mind that everything is based on time, which makes it hard for precision navigation.  Comparing to the LEGO EV3, this would be equivalent to using unregulated motor blocks based on time.  If you want raw speed, it may work.  If you want precise navigation, not a good idea….  We can touch on better methods of driving and navigation in later posts.

The next post will be learning how to read the motor encoders.

Posted in Robotics | Tagged , | Comments Off on Zumo Simple Driving Program

Pololu Zumo 32U4

img_1677

Last week, I got a Pololu Zumo 32U4.  I am quite impressed with this little robot and Pololu did a heck of a job putting this guy together.  I’m in the process of teaching a group of kids how to transition out of LEGO Mindstorms robots and into the next step, and I think this will do the trick.

The robot has:

  • Two 75:1 geared, brushed motors, both with encoders.
  • A down facing light sensor array across the front for line following and line/edge detection.
  • Three IR proximity sensors.
  • A six-axis IMU.
  • A piezo speaker.
  • A two-line LCD display.

The robot comes with full Arduino library support and several example programs.  The example programs are very useful for someone like myself for understanding how the use the sensors and actuators.  However, they are a little complex for my group of kids that transitioning from EV3-G programming to Arduino-based robotics.  Over the couple of weeks, I’ll be posting blog entries for basic lessons for teaching the kids in to transition from EV3-G to Zumo in a way with direct parallels to LEGO robotics.  We have a Sumo competition coming up in November, and it is my hope to have the learning enough about the Zumo to use this for the competition.

Posted in Robotics | Comments Off on Pololu Zumo 32U4

Air Vortex Cannon

Air Vortex Cannon Instructions

dsc_0356

Jason and I made this a long time ago, but I’m updating my site and figured this would be a good first post.

These instructions detail a homemade air vortex cannon.  This is very similar to the popular “AirZooka” that can be purchased at many toy stores and science related shops.  There is absolutely nothing wrong with the AirZooka, and it works quite well.  However, we often find it much more fun to build these things ourselves.  The attached instructions are taken from a collection of various instructions found freely on the internet.  The only really novel thing about this document is it includes a known set of materials that are proven to work well.

For a printable pdf of the instructions:

air-vortex-cannon

Required Material:

  • Bucket, 2 gallon (Home Depot, Paint Department, ~$3).
  • 2 sq feet of 4 mil thick plastic sheeting (Home Depot, Paint Department, Price unknown as we used leftover scrap material).
  • 1 12″ Canopy Tarp Tie (Home Depot, Fastener Department, ~$5 for 8 pieces).
  • Packing Tape
  • Scotch Tape
  • 1-1/8″ hardwood dowel for handle, about 6″ (We used oak.  Poplar stripped out)
  • 1/4″ thick scrap wood, roughly 1×2″
  • 1″ #8 screw, pan head.

Tools used:

  • Drill with 6″ hole saw.  This is not necessary.  You can do this with a compass to mark the circle and a utility knife.
  • Scissors
  • Home Depot “Homer” bucket.  Again, not necessary.  We used this to trace a circle.  A large compass or other round object will do.

Step 1: Cut a hole about 6″ diameter in the bottom of the bucket…. There’s a hole in the bucket, dear liza….  If you don’t have a 6″ hole saw, just draw a circle with a compass or other round object and cut with a utility knife.

dsc_0332


Step 2:  Remove any sharp edges with 120 grit sandpaper.

dsc_0334


Step 3: Trace a circle in the 4 mil plastic sheeting.  The “Homer Paint Bucket” was the perfect size.  Yet another use for this amazing item.

dsc_0337


Step 4: Cut out the circle that you just traced.  It took some experimenting to find the best scissors to cut this material cleanly.

dsc_0339


Step 5: Find the center of the circle.  We found the best way was to fold it in half twice.

dsc_0340 dsc_0341


Step 6: Cut a small hole in the center.  If you used the approach of folding it in half twice, you would just snip the very tip off.  Reinforce the center region with packing tape.  We simply put 4 pieces of 3″ long tape around the hole on both sides.

dsc_0342 dsc_0344


Step 7:  Take one of the bungie tie downs and feed it through the hole in the plastic sheeting.  Tie a knot in the bungie opposite the ball to hold the sheet in place on the bungie.

dsc_0346 dsc_0347


Step 8: Cut the bungie in half.

dsc_0348


Step 9: Cut two small holes in the side of the bucket near the bottom.  We used a 1/4″ drill bit and drilled them 2″ from the bottom.  The holes need to be on opposite sides of the bucket for the bungie cord to go through.  If you don’t have a 1/4″ drill bit, scissors or a utility knife will do.  Just don’t cut the holes too large.

dsc_0349


Step 10: Using Scotch tape, we very roughly attached the plastic circle to the bucket.  The bungee cord side goes in and the orange plastic ball side goes out.  The plastic needs to be attached so that the outer circle of the plastic is approximately at the edge of the bucket.  Since the diameter of the plastic circle is larger than the bucket, this results in some bunching up of the plastic.  The goal of the tape here is not to necessarily attach the plastic well, but just enough until the next step.

dsc_0350


Step 11: Seal the plastic circle to the bucket with packing tape.  We ran the tape about 2/3 over the bucket, and 1/3 hanging over the edge.  After applying the tape, the 1/3 that was left hanging over the edge was pressed over into the plastic sheet.  This helps seal the plastic sheet and better secures it to the bucket.

dsc_0351


Step 12:  Push one end of the bungee cord through the 1/4″ hole in the side of the bucket.  Repeat for the other piece of bungee on the other side of the bucket.  Tie a knot in the bungee cords on the outside of the bucket.  For the size bucket and bungee we used, there was about 1″ of extra material after the knot.  You may need to adjust the location of the knot to provide correct tension on the bungee.  The cord should be slack with the plastic sheet pressed all the way in the bucket, but in tension when the sheet is pulled back.

dsc_0352 dsc_0353


Step 13:  We made a handle with a 1-1/8″ diameter, 6″ long piece of birch dowel rod.  The handle was attached with a screw through the inside of the bucket.  The initial attempt was too flimsy, so we added a thin piece of wood inside the bucket to make it more rigid.  The scrap wood was 1/4″ thick, 1″ x 2″ piece.  It is attached with a single screw.  While this step is last in these instructions, we build more of these and moved this step to before we attached the plastic sheet.  This made it much easier to get a screw driver in there.

dsc_0354 dsc_0355

Take aim, pull back on the orange ball/bungee, then release.  The air vortex cannon should launch a 6″, relatively focused blast of air.

dsc_0356

While this does not look as slick as the one you can buy, it is a very functional air cannon that is fun to build.  We were blowing out candles at over 20 feet.  We could have gone farther, but we were limited by how well we could aim it, not by how focused the air blast was.  The aiming of our initial build did seem a little off.
Fun thinks to try:
  • Use a fog machine from Halloween, fill the bucket with fog, then marvel as you can launch perfect smoke rings for a good distance.  The distance the smoke rings can launch is typically limited by the stillness in the air.
  • Hang streamers from a door opening and fire at them to help learn how it aims.  It will be a little off from center.
  • See how far you can blow out candles.
  • Try shooting a balloon through your house.
  • Set up action figures and blast them down.
  • We built these as a Cub Scout project.  The buckets were prepped with handles and holes already drilled and the plastic sheeting pre-cut and taped.  A group of second graders assembled with some parental assistance and had a great time.  Overall cost for the project was on the range of $4 per person as I already had the plastic sheeting.
  • With a little modification, the vortex cannon can be “supersized” by substituting the 2 gal bucket for a 5 gal bucket.  This does require a larger circle for the diaphragm, but the bill of materials is the same.
These instructions can be freely copied, hacked, modified, etc.  Have fun and let us know of your successes!


Posted in Science Projects | Tagged , | Comments Off on Air Vortex Cannon